Category: Cob

  • ECOLIBRIUM: Bioconstructing the Future

    ECOLIBRIUM: Bioconstructing the Future

    [vc_row][vc_column][gap size=”30px” id=”” class=”” style=””][/vc_column][/vc_row][vc_row][vc_column][vc_column_text css=””]

    The Ecolibrium Space

    [/vc_column_text][gap size=”30px” id=”” class=”” style=””][/vc_column][vc_column width=”1/2″][vc_column_text css=””]

    The Ecolibrium Association is a non-profit organization that aims to promote a resilient ecosystem, establishing conscious relationships between agriculture, community, and nature, using permaculture as a tool and values of respect, equality, and collaboration.

    With this, we bring to life this space also called Ecolibrium, which will expand the work already developed by Eco Caminhos, sharing our knowledge of agroforestry and natural building with even more people. Through a broader and more inclusive educational program, we will empower our audience with theoretical knowledge in this space and continue to put skills into practice on our farm. Additionally, we will also seek financial autonomy through ecotourism, organizing courses and events, and selling the products we cultivate.


    [/vc_column_text][/vc_column][vc_column width=”1/2″][gap size=”20px” id=”” class=”” style=””][swmsc_image_gallery border_radius=”5px” border_width=”0″ border_color=”#e6e6e6″ image_margin=”20px” image_size=”large” columns=”1″ grid_type=”masonry” image_text=”only_title” hover_icon_color=”#ffffff” hover_icon_bg_color=”#f8b54e” title_text_size=”12px” title_text_color=”#555555″ caption_text_size=”16px” caption_text_color=”#777777″ caption_border=”off” id=”” class=”” style=”” image_ids=”26006″][/vc_column][/vc_row][vc_row][vc_column][gap size=”30px” id=”” class=”” style=””][/vc_column][/vc_row][vc_row][vc_column][vc_column_text css=””]

    The Architectural Project

    [/vc_column_text][gap size=”30px” id=”” class=”” style=””][/vc_column][vc_column][vc_column_text css=””]

    The architectural project, developed by Mexican architect Pedro Pizarro Villalobos, was designed to host volunteers, students, and tourists, and to connect institutions, farmers, and local builders.

    [/vc_column_text][gap size=”30px” id=”” class=”” style=””][/vc_column][vc_column][swmsc_image_gallery border_radius=”5px” border_width=”0″ border_color=”#e6e6e6″ image_margin=”20px” image_size=”full” columns=”1″ grid_type=”masonry” image_text=”only_title” hover_icon_color=”#ffffff” hover_icon_bg_color=”#f8b54e” title_text_size=”12px” title_text_color=”#555555″ caption_text_size=”16px” caption_text_color=”#777777″ caption_border=”off” id=”” class=”” style=”” image_ids=”26162″][gap size=”30px” id=”” class=”” style=””][/vc_column][/vc_row][vc_row][vc_column width=”1/2″][vc_column_text css=””]

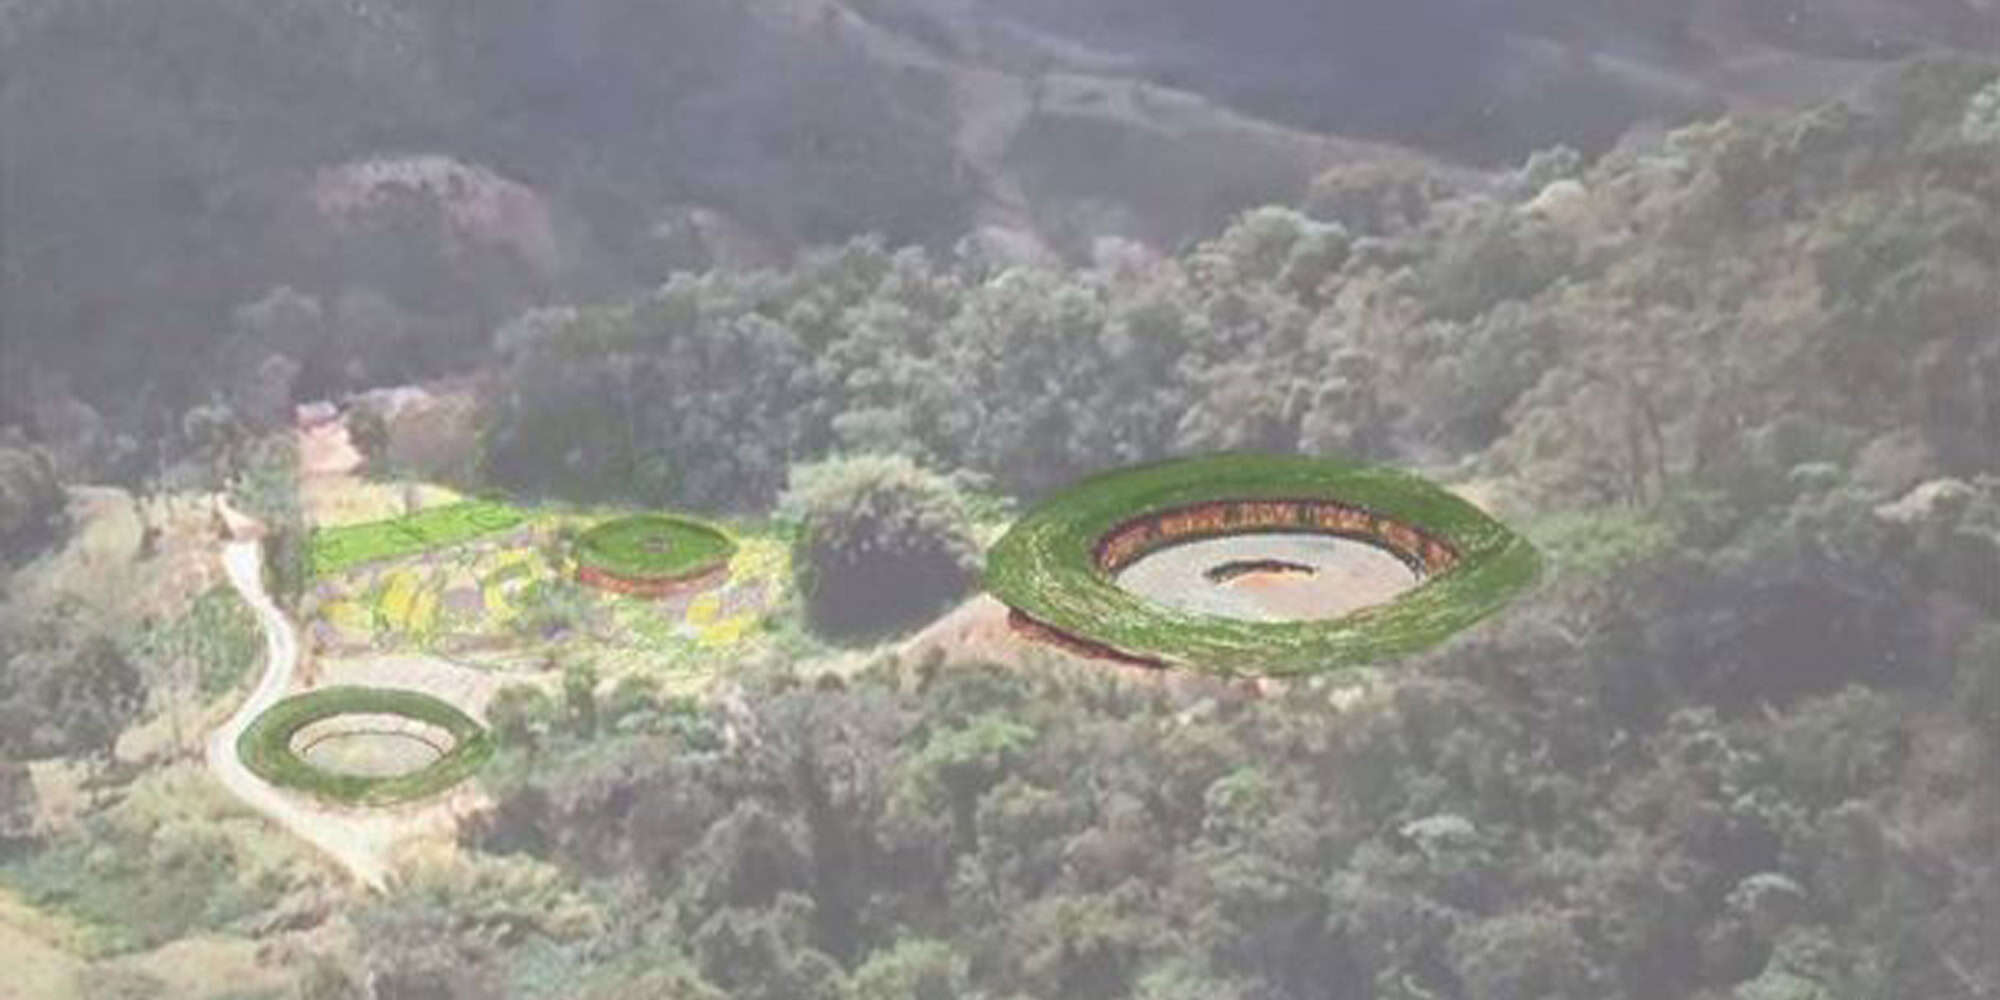
    The building is a large circle and will include collective accommodations, among them dormitories and suites, kitchen, laundry, and bathrooms, as well as a workshop and a multifunctional area for activities, administrative office, and a restaurant with a view of the valley open to the general public, all connected by a large central courtyard.

    [/vc_column_text][/vc_column][vc_column width=”1/2″][swmsc_image_gallery border_radius=”5px” border_width=”0″ border_color=”#e6e6e6″ image_margin=”20px” image_size=”full” columns=”2″ grid_type=”masonry” image_text=”only_title” hover_icon_color=”#ffffff” hover_icon_bg_color=”#f8b54e” title_text_size=”10px” title_text_color=”#555555″ caption_text_size=”14px” caption_text_color=”#777777″ caption_border=”off” id=”” class=”” style=”” image_ids=”26163,26164″][/vc_column][/vc_row][vc_row][vc_column][gap size=”30px” id=”” class=”” style=””][/vc_column][/vc_row][vc_row][vc_column][vc_column_text css=””]

    Construction Phases and Strategies

    [/vc_column_text][/vc_column][/vc_row][vc_row][vc_column][gap size=”30px” id=”” class=”” style=””][/vc_column][/vc_row][vc_row][vc_column width=”1/2″][gap size=”50px” id=”” class=”” style=””][vc_column_text css=””]

    The project is divided into three phases, and we are currently in the first. It is in this phase that most of the collective use accommodations are taking shape, such as the kitchen, laundry, two bathrooms, five rooms, and two of the eight suites.

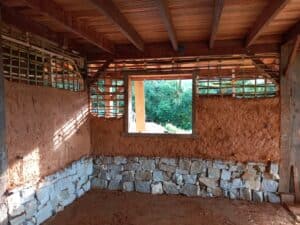
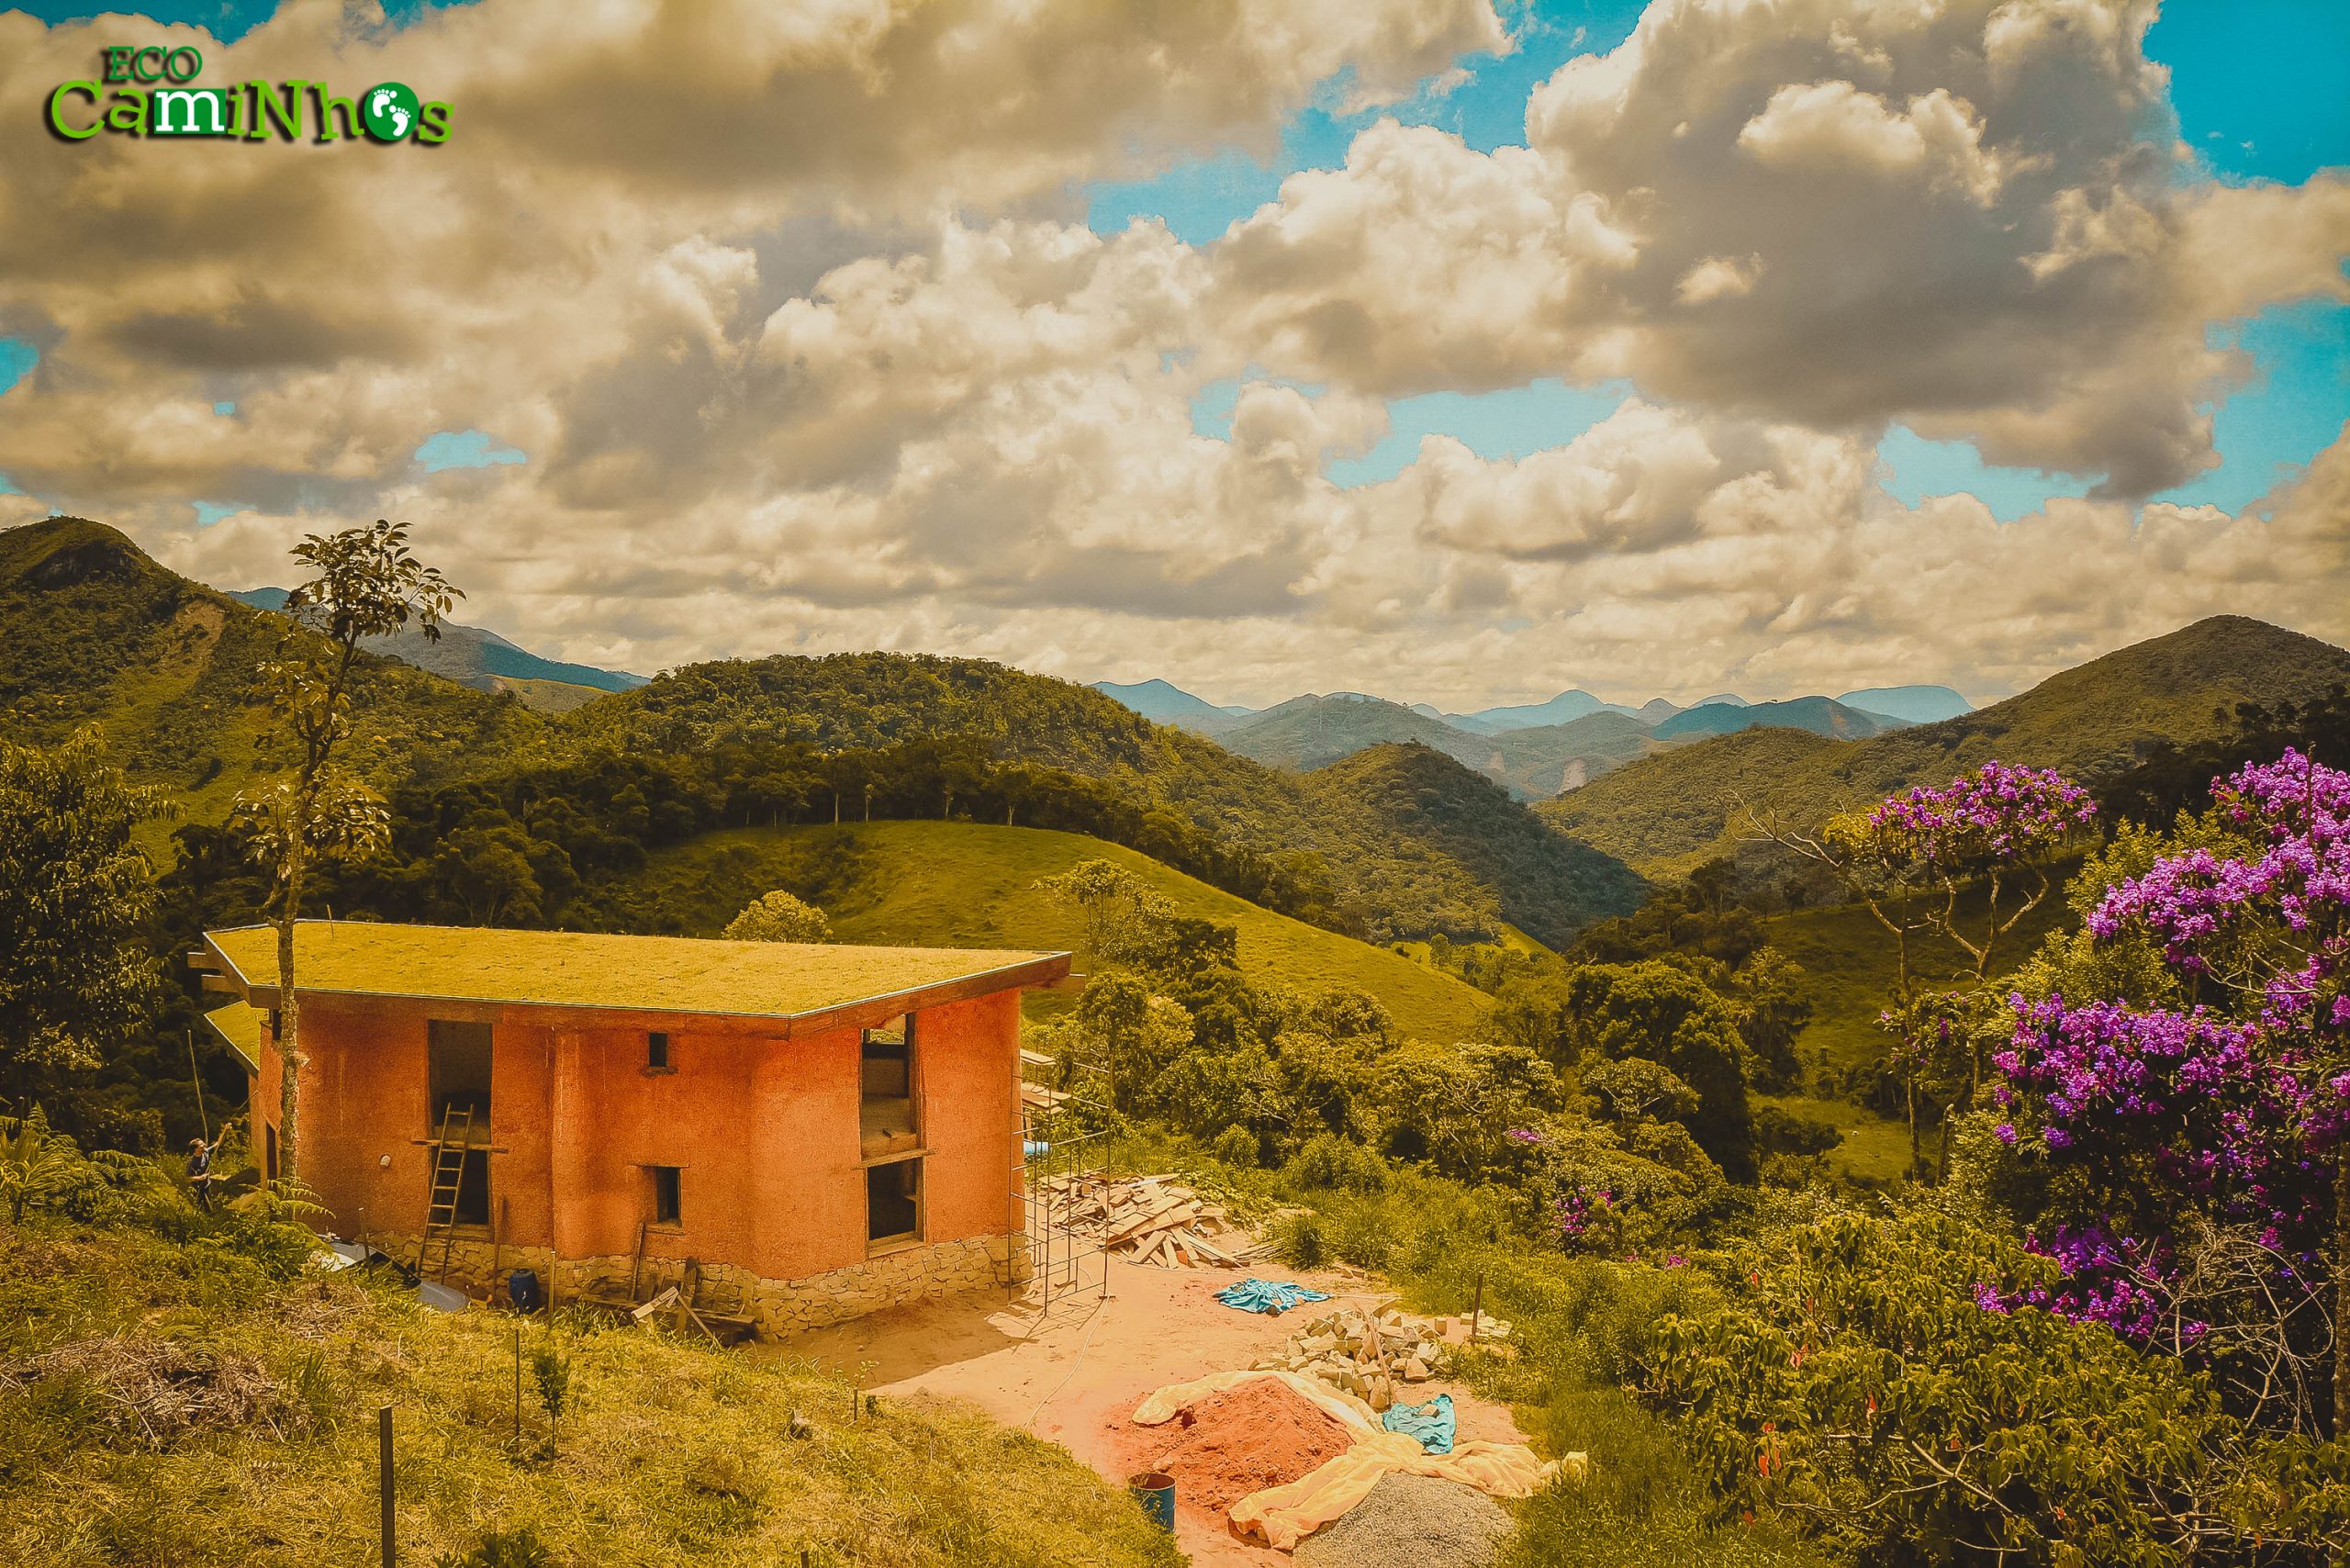
    The main technique used here, as in all our constructions, is cob, also known as adobe, in this case, in solid walls over 40 cm thick, ensuring thermal and acoustic comfort and fulfilling its structural function to support the green roof. As the base of this wall, we use stones, one part below the ground for the foundation, along with a thick layer of gravel and piping for drainage in this area, and another part above, serving to protect the walls from ground moisture and rain since the eaves are not very extensive.

    [/vc_column_text][/vc_column][vc_column width=”1/2″][swmsc_image_gallery border_radius=”5px” border_width=”0″ border_color=”#e6e6e6″ image_margin=”20px” image_size=”large” columns=”1″ grid_type=”masonry” image_text=”only_title” hover_icon_color=”#ffffff” hover_icon_bg_color=”#f8b54e” title_text_size=”12px” title_text_color=”#555555″ caption_text_size=”16px” caption_text_color=”#777777″ caption_border=”off” id=”” class=”” style=”” image_ids=”26225″][/vc_column][/vc_row][vc_row][vc_column][gap size=”30px” id=”” class=”” style=””][/vc_column][/vc_row][vc_row][vc_column width=”1/2″][gap size=”55px” id=”” class=”” style=””][swmsc_image_gallery border_radius=”5px” border_width=”0″ border_color=”#e6e6e6″ image_margin=”20px” image_size=”large” columns=”1″ grid_type=”masonry” image_text=”only_title” hover_icon_color=”#ffffff” hover_icon_bg_color=”#f8b54e” title_text_size=”12px” title_text_color=”#555555″ caption_text_size=”16px” caption_text_color=”#777777″ caption_border=”off” id=”” class=”” style=”” image_ids=”26166″][/vc_column][vc_column width=”1/2″][vc_column_text css=””]

    Taking advantage of the steep slope of the land, the second phase will be a floor below phases one and three, which we consider the ground floor. For this, a retaining wall will need to be built, along with a structure with pillars that will support the third phase. In this case, the walls will be only partitions, which can be thinner and consequently require less material, speeding up the process. Thus, we opted for the so-called wattle and daub technique, using a lattice of wood and bamboo, later covered with cob.

    In the second stage, the executive and educational sector predominates, where the administrative office, workshop, and multifunctional space will be located.

    [/vc_column_text][/vc_column][/vc_row][vc_row][vc_column][gap size=”50px” id=”” class=”” style=””][/vc_column][/vc_row][vc_row][vc_column width=”1/2″][gap size=”10px” id=”” class=”” style=””][vc_column_text css=””]

    The third phase will be built on top of the second phase, completing the ground floor circle and creating a large internal courtyard. At the front of the building, a wooden deck extends towards the valley. This phase will include the entire structure of the restaurant, which is still under development, and the other suites.

    In this case, the chosen technique was also rammed earth, due to its lighter weight, which demands less from the underlying structure. For the coverage of the entire set, a green roof was planned, as it not only uses natural raw materials, prevents heat transfer to the surroundings, keeps the internal temperature pleasant, but also looks aesthetically amazing and maintains the characteristic of the buildings on the farm.

    [/vc_column_text][/vc_column][vc_column width=”1/2″][swmsc_image_gallery border_radius=”5px” border_width=”0″ border_color=”#e6e6e6″ image_margin=”20px” image_size=”large” columns=”1″ grid_type=”masonry” image_text=”only_title” hover_icon_color=”#ffffff” hover_icon_bg_color=”#f8b54e” title_text_size=”12px” title_text_color=”#555555″ caption_text_size=”16px” caption_text_color=”#777777″ caption_border=”off” id=”” class=”” style=”” image_ids=”26167″][/vc_column][/vc_row][vc_row][vc_column][gap size=”30px” id=”” class=”” style=””][/vc_column][/vc_row][vc_row][vc_column][vc_column_text css=””]

    First Phase – Construction Stages

    [/vc_column_text][/vc_column][/vc_row][vc_row][vc_column][gap size=”30px” id=”” class=”” style=””][swmsc_image_gallery border_radius=”5px” border_width=”0″ border_color=”#e6e6e6″ image_margin=”20px” image_size=”large” columns=”1″ grid_type=”masonry” image_text=”only_title” hover_icon_color=”#ffffff” hover_icon_bg_color=”#f8b54e” title_text_size=”12px” title_text_color=”#555555″ caption_text_size=”16px” caption_text_color=”#777777″ caption_border=”off” id=”” class=”” style=”” image_ids=”26168″][/vc_column][/vc_row][vc_row][vc_column][vc_column_text css=””]

    Executed Stages:

    [/vc_column_text][/vc_column][/vc_row][vc_row][vc_column][gap size=”30px” id=”” class=”” style=””][/vc_column][/vc_row][vc_row][vc_column][vc_column_text css=””]

    1.FOUNDATION: consisting of a high layer of gravel approximately 1 meter thick, with a drainage system and covered by large stones bonded with concrete;

    [/vc_column_text][/vc_column][/vc_row][vc_row][vc_column][gap size=”30px” id=”” class=”” style=””][/vc_column][/vc_row][vc_row][vc_column width=”1/4″][/vc_column][vc_column width=”1/2″][swmsc_image_gallery border_radius=”5px” border_width=”0″ border_color=”#e6e6e6″ image_margin=”20px” image_size=”full” columns=”1″ grid_type=”masonry” image_text=”only_title” hover_icon_color=”#ffffff” hover_icon_bg_color=”#f8b54e” title_text_size=”12px” title_text_color=”#555555″ caption_text_size=”16px” caption_text_color=”#777777″ caption_border=”off” id=”” class=”” style=”” image_ids=”26169″][/vc_column][vc_column width=”1/4″][/vc_column][/vc_row][vc_row][vc_column][vc_column_text css=””]

    2. WALLS – BASE: a stone wall approximately 40cm wide and 60cm high, elevating the earth wall from the ground and where wooden posts were fixed to support the walls; in this stage, we also left the hydraulic connections;

    [/vc_column_text][/vc_column][/vc_row][vc_row][vc_column][gap size=”30px” id=”” class=”” style=””][/vc_column][/vc_row][vc_row][vc_column width=”1/4″][/vc_column][vc_column width=”1/2″][swmsc_image_gallery border_radius=”5px” border_width=”0″ border_color=”#e6e6e6″ image_margin=”20px” image_size=”full” columns=”1″ grid_type=”masonry” image_text=”only_title” hover_icon_color=”#ffffff” hover_icon_bg_color=”#f8b54e” title_text_size=”12px” title_text_color=”#555555″ caption_text_size=”16px” caption_text_color=”#777777″ caption_border=”off” id=”” class=”” style=”” image_ids=”26170″][/vc_column][vc_column width=”1/4″][/vc_column][/vc_row][vc_row][vc_column][vc_column_text css=””]

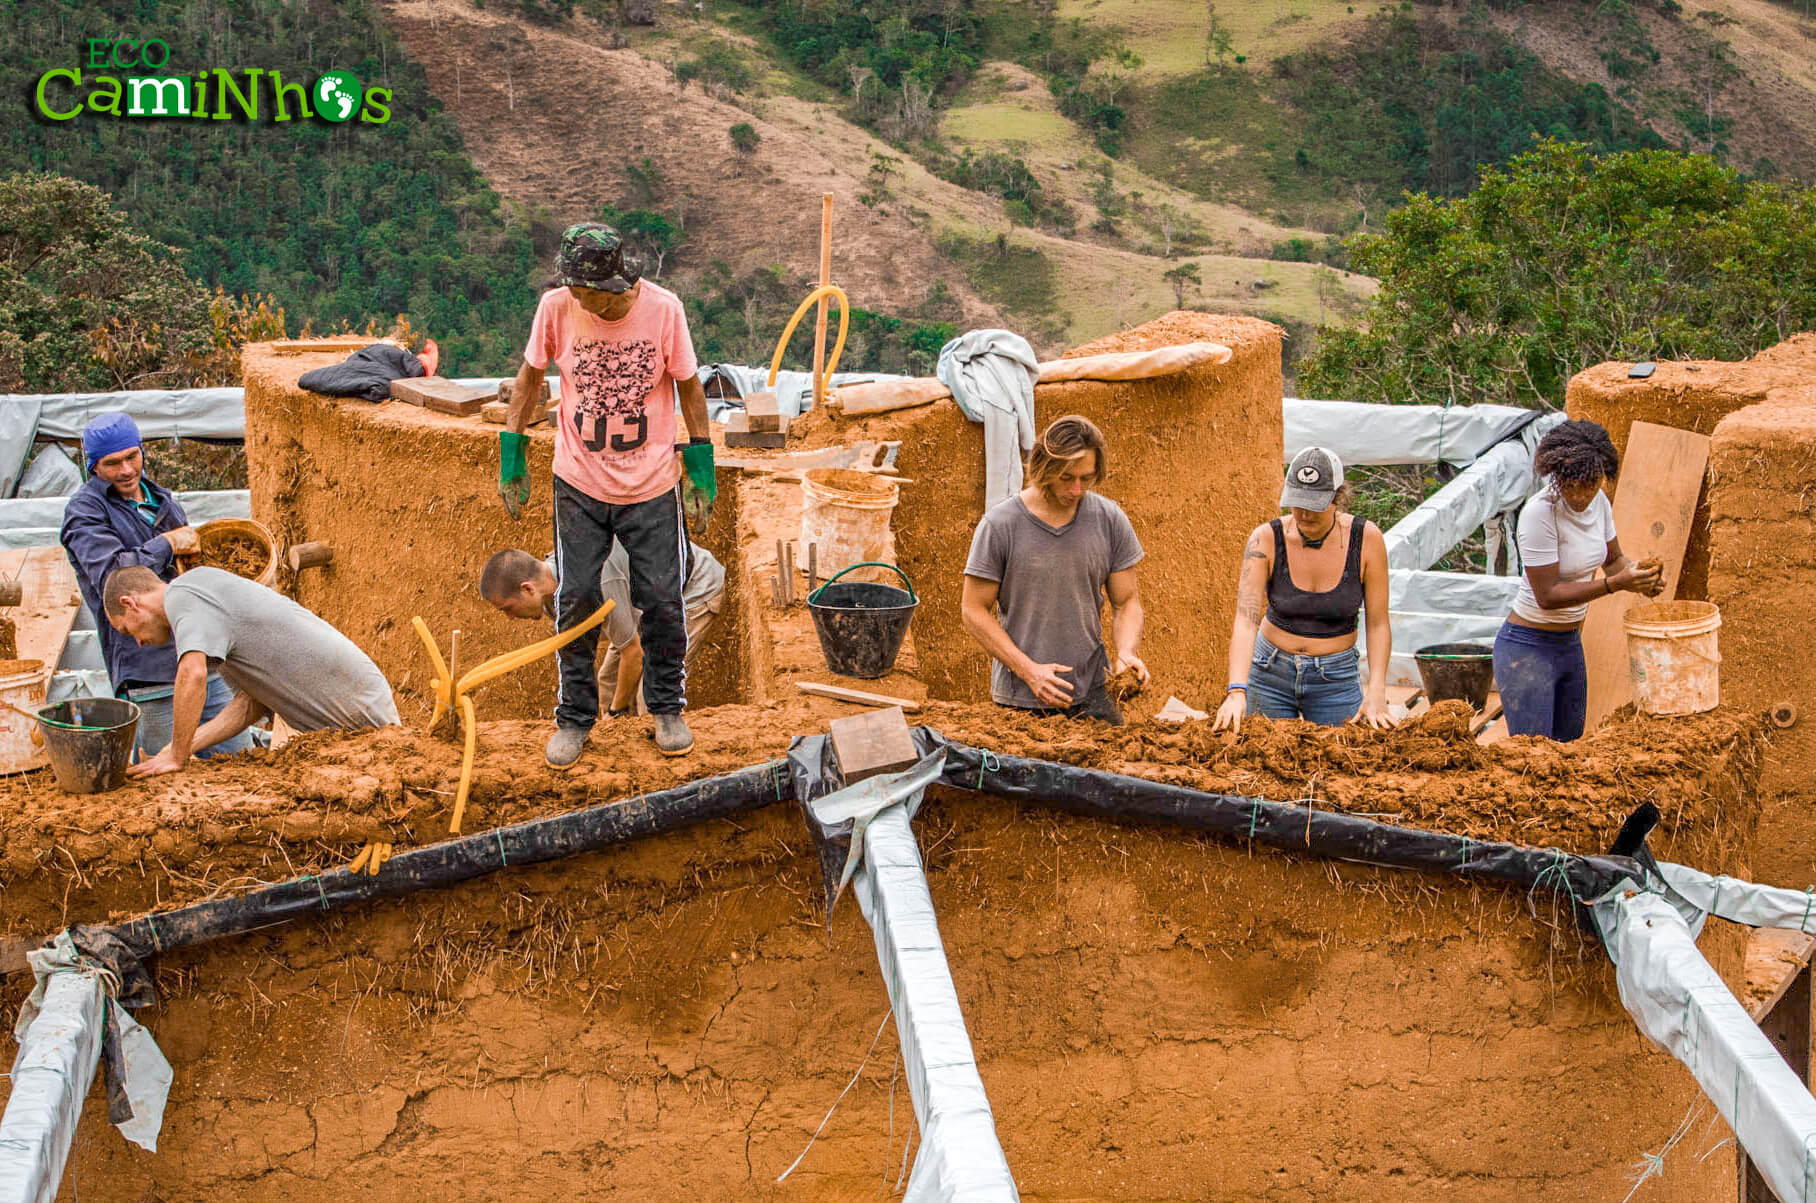
    3. WALLS – COB: we obtained cob through a mixture of earth, sand, grass, and water, and it is essentially the core of the construction. We lay layers of 40cm width and structure the walls. For each layer of approximately 30cm height, we place bamboo slats across the posts to ensure more resistance to possible movements. At this stage, we also install conduits for electrical wiring;

    [/vc_column_text][/vc_column][/vc_row][vc_row][vc_column][gap size=”30px” id=”” class=”” style=””][/vc_column][/vc_row][vc_row][vc_column width=”1/4″][/vc_column][vc_column width=”1/2″][swmsc_image_gallery border_radius=”5px” border_width=”0″ border_color=”#e6e6e6″ image_margin=”20px” image_size=”full” columns=”1″ grid_type=”masonry” image_text=”only_title” hover_icon_color=”#ffffff” hover_icon_bg_color=”#f8b54e” title_text_size=”12px” title_text_color=”#555555″ caption_text_size=”16px” caption_text_color=”#777777″ caption_border=”off” id=”” class=”” style=”” image_ids=”26171″][/vc_column][vc_column width=”1/4″][/vc_column][/vc_row][vc_row][vc_column][vc_column_text css=””]

    4. LINTELS – for the door and window openings, we used planks from railway sleepers, which are repurposed and very durable. These will later be used to install the frames and also act as lintels. After installing them, we continue to raise the walls;

    [/vc_column_text][/vc_column][/vc_row][vc_row][vc_column][gap size=”30px” id=”” class=”” style=””][/vc_column][/vc_row][vc_row][vc_column width=”1/4″][/vc_column][vc_column width=”1/2″][swmsc_image_gallery border_radius=”5px” border_width=”0″ border_color=”#e6e6e6″ image_margin=”20px” image_size=”full” columns=”1″ grid_type=”masonry” image_text=”only_title” hover_icon_color=”#ffffff” hover_icon_bg_color=”#f8b54e” title_text_size=”12px” title_text_color=”#555555″ caption_text_size=”16px” caption_text_color=”#777777″ caption_border=”off” id=”” class=”” style=”” image_ids=”26172″][/vc_column][vc_column width=”1/4″][/vc_column][/vc_row][vc_row][vc_column][gap size=”10px” id=”” class=”” style=””][/vc_column][/vc_row][vc_row][vc_column][vc_column_text css=””]

    Stage in progress:

    [/vc_column_text][/vc_column][/vc_row][vc_row][vc_column][gap size=”30px” id=”” class=”” style=””][/vc_column][/vc_row][vc_row][vc_column][vc_column_text css=””]

    5. WOODEN “RING”: when we reach a wall height of 2.50 meters, we place wooden beams over them, fitting them in and creating a kind of belt around the structure. After this, we continue with cob in a diagonal to create the roof slope;

    [/vc_column_text][/vc_column][/vc_row][vc_row][vc_column][gap size=”30px” id=”” class=”” style=””][/vc_column][/vc_row][vc_row][vc_column width=”1/4″][/vc_column][vc_column width=”1/2″][swmsc_image_gallery border_radius=”5px” border_width=”0″ border_color=”#e6e6e6″ image_margin=”20px” image_size=”full” columns=”1″ grid_type=”masonry” image_text=”only_title” hover_icon_color=”#ffffff” hover_icon_bg_color=”#f8b54e” title_text_size=”12px” title_text_color=”#555555″ caption_text_size=”16px” caption_text_color=”#777777″ caption_border=”off” id=”” class=”” style=”” image_ids=”26173″][/vc_column][vc_column width=”1/4″][/vc_column][/vc_row][vc_row][vc_column][gap size=”10px” id=”” class=”” style=””][/vc_column][/vc_row][vc_row][vc_column][vc_column_text css=””]

    Next Stages:

    [/vc_column_text][/vc_column][/vc_row][vc_row][vc_column][gap size=”30px” id=”” class=”” style=””][/vc_column][/vc_row][vc_row][vc_column][vc_column_text css=””]

    6. BEAMS AND PURLINS: we will place wooden beams perpendicularly to the walls to support the roof, and over them, the purlins;

    7. CEILING COVERING: the purlins will receive wooden boards that make up the ceiling and will later receive the green roof;

    8. GREEN ROOF: consists of a waterproofing system, a drainage system, and a substrate where plant species will be planted. We decided to cover this part of the work before finishing the veranda side because we are entering the rainy season, and with the covering, we can continue working internally;

    9. VERANDA: we will execute the foundation for the columns, which will be pieces of railway sleepers measuring 16x24cm and will have the same roofing structure as the building;

    10. SUBFLOOR AND FLOOR: the ground will receive a layer of expanded clay for thermal insulation, a concrete layer, and a stone floor covering, which will be easy to maintain and resistant to the high traffic the location will receive;

    11. FINISHES: at this stage, the walls will be covered with plaster and stucco, using a mixture of clay, sand, ground straw, and lime for internal use, and a mixture of clay, sand, fresh manure, and linseed oil for external use. Electrical, hydraulic installations, and frames will also be completed.

    [/vc_column_text][/vc_column][/vc_row][vc_row][vc_column][gap size=”60px” id=”” class=”” style=””][/vc_column][/vc_row][vc_row][vc_column width=”1/2″][swmsc_image_gallery border_radius=”5px” border_width=”0″ border_color=”#e6e6e6″ image_margin=”20px” image_size=”large” columns=”1″ grid_type=”masonry” image_text=”only_title” hover_icon_color=”#ffffff” hover_icon_bg_color=”#f8b54e” title_text_size=”12px” title_text_color=”#555555″ caption_text_size=”16px” caption_text_color=”#777777″ caption_border=”off” id=”” class=”” style=”” image_ids=”26099″][/vc_column][vc_column width=”1/2″][vc_column_text css=””]

    The stages were defined in this sequence due to the rainy season, which usually begins at the end of September. Therefore, we are speeding up to cover what has been done so far, postponing the veranda construction and thus enabling the completion of the final finishes under the covering.

    We started the work in February 2024, thanks to donations from partners and to our collaborators, apprentices, and temporary volunteers, who literally got their hands dirty, guided and supervised by builder Jorge Dutra and director Bart Bijen. We are now focusing our efforts on completing this first phase and raising funds for the next phases.

    [/vc_column_text][/vc_column][/vc_row][vc_row][vc_column][gap size=”50px” id=”” class=”” style=””][/vc_column][/vc_row][vc_row][vc_column][vc_column_text css=””]

    Collaborators:

    [/vc_column_text][gap size=”30px” id=”” class=”” style=””][vc_column_text css=””]Architectural Project: Pedro Pizarro Villalobos
    Construction Manager: Arthur Antony
    Construction Master: Jorge Dutra
    Construction Team: Rhana Parajara, Wallace Ferreira and Pedro Lindemann
    Project Detailing and Construction Team: Alieska Zancanaro[/vc_column_text][gap size=”30px” id=”” class=”” style=””][vc_column_text css=””]

    Investor Partners:

    [/vc_column_text][gap size=”30px” id=”” class=”” style=””][swmsc_image link=”#” lightbox=”true” target=”_self” lightbox_type=”image” align=”center” alt=”” title=”” border_radius=”5px” id=”” class=”” style=”” src=”26138″][vc_column_text css=””]Gomes Stiehle Family
    & individual donors[/vc_column_text][gap size=”30px” id=”” class=”” style=””][/vc_column][/vc_row][vc_row][vc_column][gap size=”30px” id=”” class=”” style=””][/vc_column][/vc_row]
  • More Sustainable Doesn’t Have to Equal Less Comfort

    More Sustainable Doesn’t Have to Equal Less Comfort

    A family shares their experiences staying in Eco Caminhos’ newly-built Eco Lodge

    By Liuan Huska, eco-experience volunteer

    (Read more about the Huska family’s year-long travels through South America on their blog, Slow Camino.)

    “If you want to be nice to the environment, go ahead and build a shack in the woods, dance half-naked around the fire, and cut yourself off from the system.” This is the essence of what my husband, Matt, told me in one of our many discussions around my environmental ideals and modern reality.

    In my ideal world, I want to have a positive rather than negative impact on the earth. But the reality is that we live in a global society structured around high energy consumption, disrespect for nature, and depletion of natural resources. It’s hard, on your own, to escape living in this system.

    Given this reality, the idea of sustainable living has often been tied to the idea of sacrifice. To be kind to the planet, we think, we must sacrifice our conveniences, our meat, our flights, and our creaturely comforts like a warm house in the winter. We assume that reducing our carbon and ecological footprint means we have to go backwards along the trajectory of human progress. We have to regress to a more primitive, less comfortable, way of life.

    I still think we need to dramatically shift our understanding of a “good life” toward less materialism and consumption. But living at the Eco Lodge here at Eco Caminhos has made me question the equation of MORE SUSTAINABLE = LESS COMFORT.

    What is Eco Caminhos and the Eco Lodge?

    The Eco Lodge at Eco Caminhos.

    Eco Caminhos is a permaculture farm in the mountains north of Rio de Janeiro, within the Atlantic Forest ecosystem. Their focus is on bioconstruction (using sustainable, local, and natural materials to build) and agroforestry (integrating trees and mimicking forest systems in crop growing). They also welcome a range of people to participate and learn, including local Brazilian apprentices, short- and long-term international volunteers, and families like us.

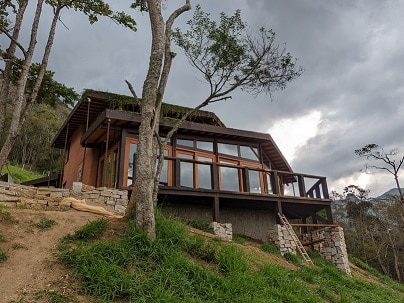
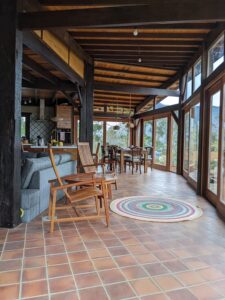
    The Eco Lodge is the third major bioconstructed building that Bart Bijen (the founder of Eco Caminhos) and his team have taken on. When you enter the gates of the farm, located on outskirts of Nova Friburgo city, you can see the Eco Lodge perched at the top of a steep, zigzagging road into the property. It is a beautiful structure – rustic wooden outlines, stone base, earth-toned walls, vines from the green roof hanging down, and an expansive glass-lined living area opening out to a recycled-wood deck that takes in the sweep of the mountains and the Cardinot valley.

    The building in-progress. You can see the natural stone, cob, and wood.

    Since we started traveling South America three months ago, the Eco Lodge is by far the most luxurious accommodation we’ve stayed in. It is also, amazingly, the most sustainable. The building is made almost entirely of sustainable materials: locally sourced rocks, recycled wood, and cob walls consisting of a mixture of clay, sand, grass, and manure (almost all found on the property). There were some elements that had to be obtained from farther away, for example, hardwood beams (which are certified as not coming from the Amazon rainforest), various fixtures, drywall for the upstairs room partitions, and wood finishes.

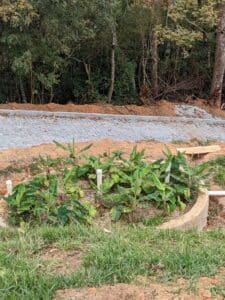
    Connected to the farm’s solar net zero energy system, all the electricity we use in the Eco Lodge is renewable and carbon-free. The induction stove is electric and the hot water is powered by a solar boiler, so the building uses no natural gas. Our water supply is filtered after coming from higher-elevation mountain springs, and our waste water goes into a black-water and grey-water banana filter system directly below the house.

    The wastewater system uses banana plants for filtering.

    How does it feel to stay in the Eco Lodge?

    Warmer

    We stayed in a condo not far from Eco Caminhos for the first month of our time in Brazil, during July and August. Though this was an upper-class neighborhood, the home was built in typical Brazilian style—concrete walls, tile roof, and drafty. (Concrete, though cheap and convenient, has a huge carbon footprint.) Winters in this area are mild by Midwestern US standards, with temperatures dipping into the 40s Fahrenheit, or about 5 degrees Celsius. But without indoor heating or insulation, this translates to considerable discomfort. On some of the coldest days we wrapped ourselves in blankets, put on dance music, and did everything we could to keep warm.

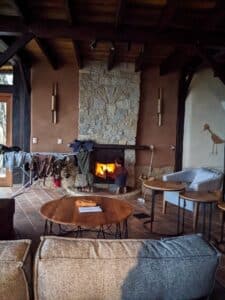
    The Eco Lodge, with its thick earthen walls, holds heat in the winter and keeps cool in the summer. Despite some rainy, chilly days here, we haven’t felt nearly as cold as we did in the other Brazilian houses we’ve stayed in. Our kids have also really enjoyed tending the wood-burning fireplace, which is equipped with a fan that distributes the heat throughout the house.

    The fireplace keeps the Eco Lodge nice and warm, and also helps dry the clothes faster!

    As the world adjusts to more extreme weather, we can take inspiration from houses like these. The Eco Lodge is built with attention to the local microclimate, such as the position of the sun, the shadows of the mountains, how the water flows downhill, and wind patterns. Taking cues from nature, the goal is to work with, rather than against, the elements. By building smartly and consciously, we can preserve human comfort without further damaging the ecosystems that support us.

    Small adjustments to rely on renewable energy

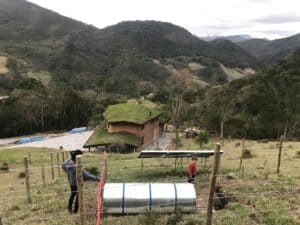
    Solar energy is just that—coming from the sun. The farm produces solar energy through 16 panels installed on the roof of an all-purpose pavilion and uses solar boilers for heating water. But on days when it’s not sunny, these panels are not producing enough for everyday use. The available battery storage technology is still too expensive and ineffective to warrant the investment. While the goal is to become totally energy-independent, for now the farm is connected to the larger electricity grid. It puts solar energy into the grid when there is excess and relies on the grid when more is needed. This amounts to a net-zero energy balance.

    We take a visit to the solar water boiler above the house. It is an amazing contraption!

    For the solar water boiler, most of the time the hot water tank is not connected to the grid. There is often enough sun during the day to sufficiently heat the tank for warm showers. But if it’s a cloudy day and we want to shower, we have to remember to switch on the breaker for the water boiler to connect it to the grid and let it warm for a few hours. Otherwise, it’s a VERY refreshing cold shower. We’ve preferred to stay dirty on days when we forget.

    This is an example of the kinds of small changes we will need to make as we shift our energy systems away from fossil fuels to wind and solar energy. Like the people of Uruguay, who are leading the way in an energy transition that doesn’t sacrifice human comfort, we might have to organize our more energy-intensive tasks around the periods when wind and sun are most abundant. For me, these small shifts are totally worth the benefits of not releasing more carbon into the atmosphere and further polluting the air we breathe.

    Connected to the Earth

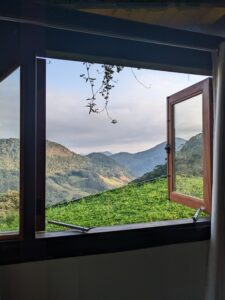
    The morning view from an upstairs bedroom window.

    We wake up at six in the morning to daylight breaking through the curtains and bird calls. I rub my eyes, put my feet on the acacia wood floor, and pull aside the curtains to see what views Mother Nature is gifting today. Sometimes it’s a lush world of drizzly mist, sometimes it’s bright sunshine and a breeze, sometimes it’s fluffy clouds that blanket the valley below. Often, I open the windows to look out over the green roof and take a couple minutes to breathe the crisp mountain air.

    Our kids enjoyed playing right in front of the wall-to-wall windows. Amazing view!

    After getting dressed for a day of work on the farm, I walk down the spiral staircase to see my kids playing in front of the wall-to-wall glass windows that open out to the terrace. I never get tired of this stunning view. My toes touch the cool tile and I shuffle over to the open-concept kitchen to eat breakfast.

    After breakfast, we walk the farm road up to Colmeia, where the day’s farm activities begin. This is one of my favorite parts of the day. We step out right into the middle of the farm, not quite knowing what the day holds. Maybe it will be an encounter with a cow, a good conversation with other volunteers, a reflective time planting corn among the zucchini seedlings, or the satisfying manual labor of collecting cow manure or digging a trench to start a bioconstructed toolshed.

    After a full day of work and learning, I often stop by the fields on the way home to pull a head of lettuce and some green onions to make a salad to go with dinner. Maybe we’ll have some roasted cauliflower from the fields as well, or lentils with farm-grown collard greens. It’s lovely to live so close to the food we’re eating and understand the love and respect that has gone into growing it.

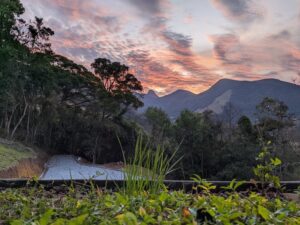
    Sunset over Focinho do Porco Mountain, viewed from an Eco Lodge window.

    As the sun sets, I look over the mountain ridges encircling the Eco Lodge. There’s Focinho do Porco (Pig’s Snout), my favorite, towering over the rest in the distance. It’s a special experience to stay in a place like this, sheltered by the wood, stone, and earth that has formed right in this area over decades and millennia. I know we won’t always be in such a beautiful place, but I hope to recreate this feeling of connection to the earth in whatever places we end up calling home.


  • Build a Cob Wall

    Build a Cob Wall

    There are many techniques and materials for how you can build a wall. Most people are familiar with the current conventional methods; bricks, concrete blocks, and drywall immediately come to mind. How you build a wall made of cob, however, is a totally different process. Be sure to familiarize yourself with what cob is and how to make it before you start building your wall(s)!


    To build a cob wall, you must first make a base structure. This is essential for supporting the weight of the walls and for keeping them at an appropriate distance from the ground’s humidity. That means your base needs to be at least 20 cm tall. To be clear, that’s the absolute minimum – the higher the humidity is, the higher the base will need to be, too. Here, we will be using stone for our base construction since it is one of the most common, resilient, and accessible options available.

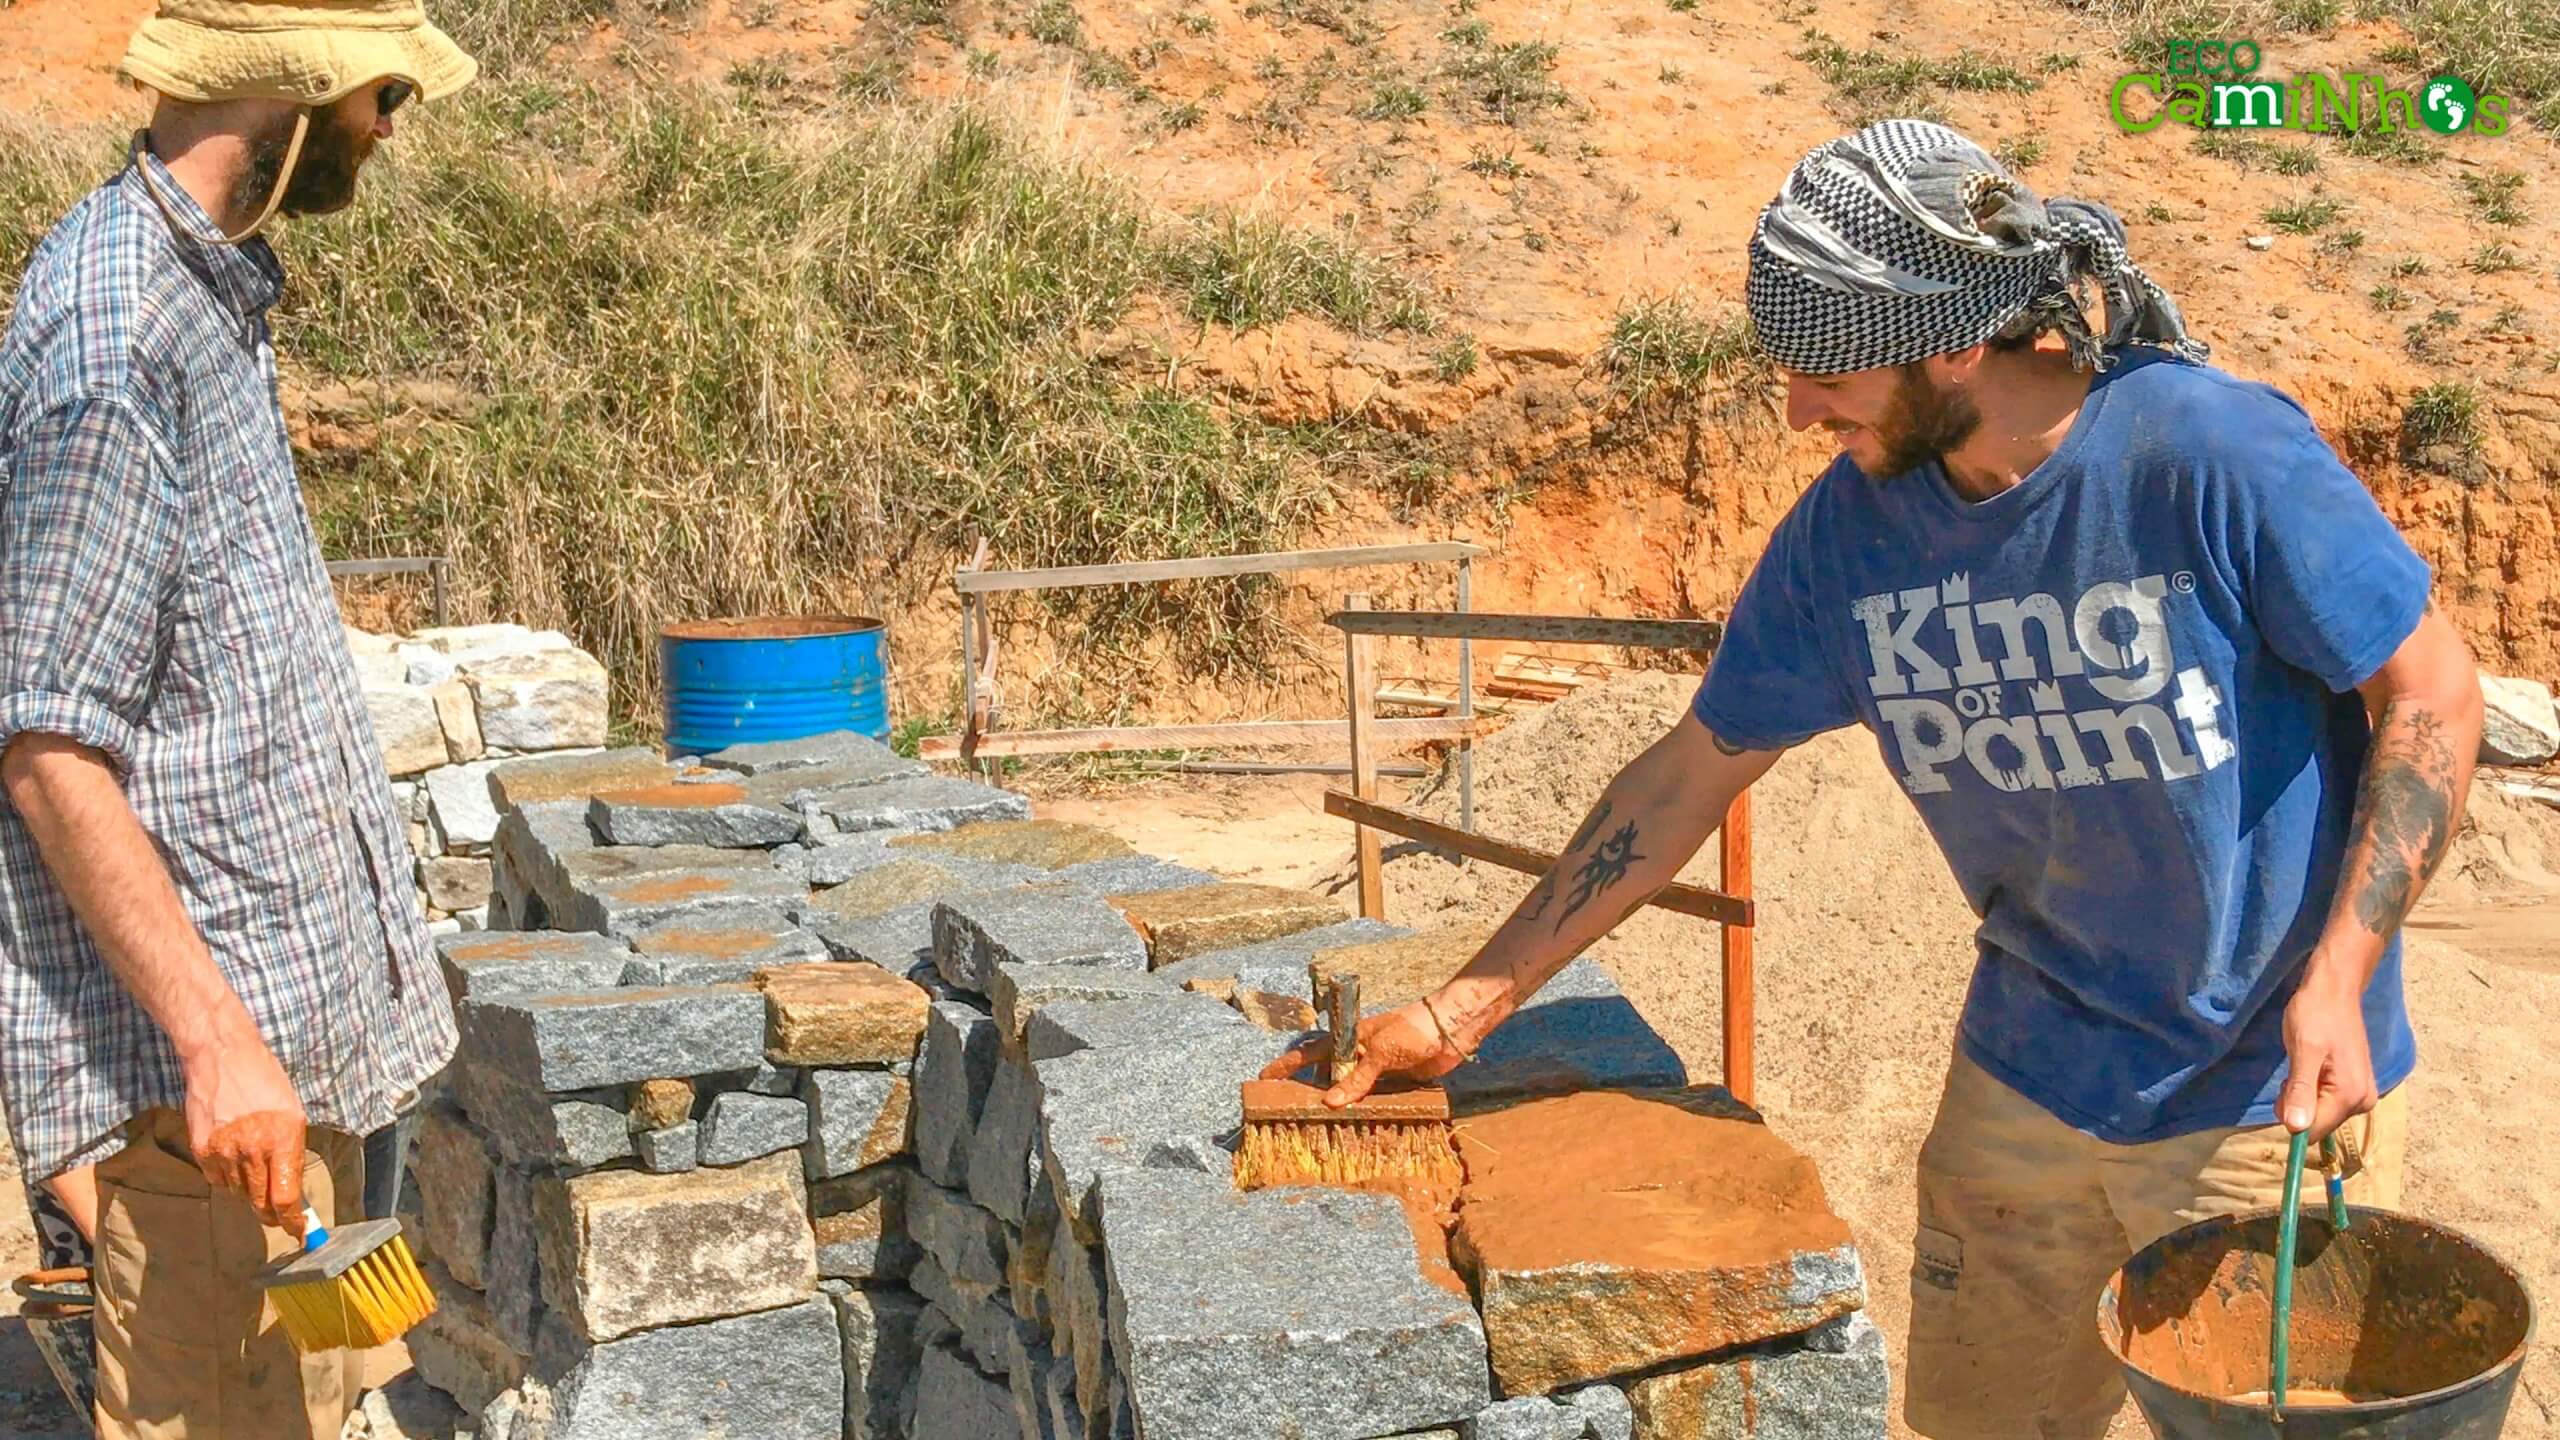
    Generally speaking, stone bases can be built in one of two ways. One such way is the drystack method which requires quality stones in a wide variety of sizes and, more importantly, demands expertise. This technique involves stacking stones without using any mortar to hold the rocks together. In theory, this is as simple as it gets… just a long pile of rocks and nothing else. But in practice, this technique demands a great deal of effort, planning, patience, and skill. We have used this natural building (bioconstruction) technique at our Eco Lodge project, as you can see in the photo below. Though not as environmentally-friendly, the second – quicker and easier – approach is to build your stone base using mortar to fill in the cracks and bind the stones together.

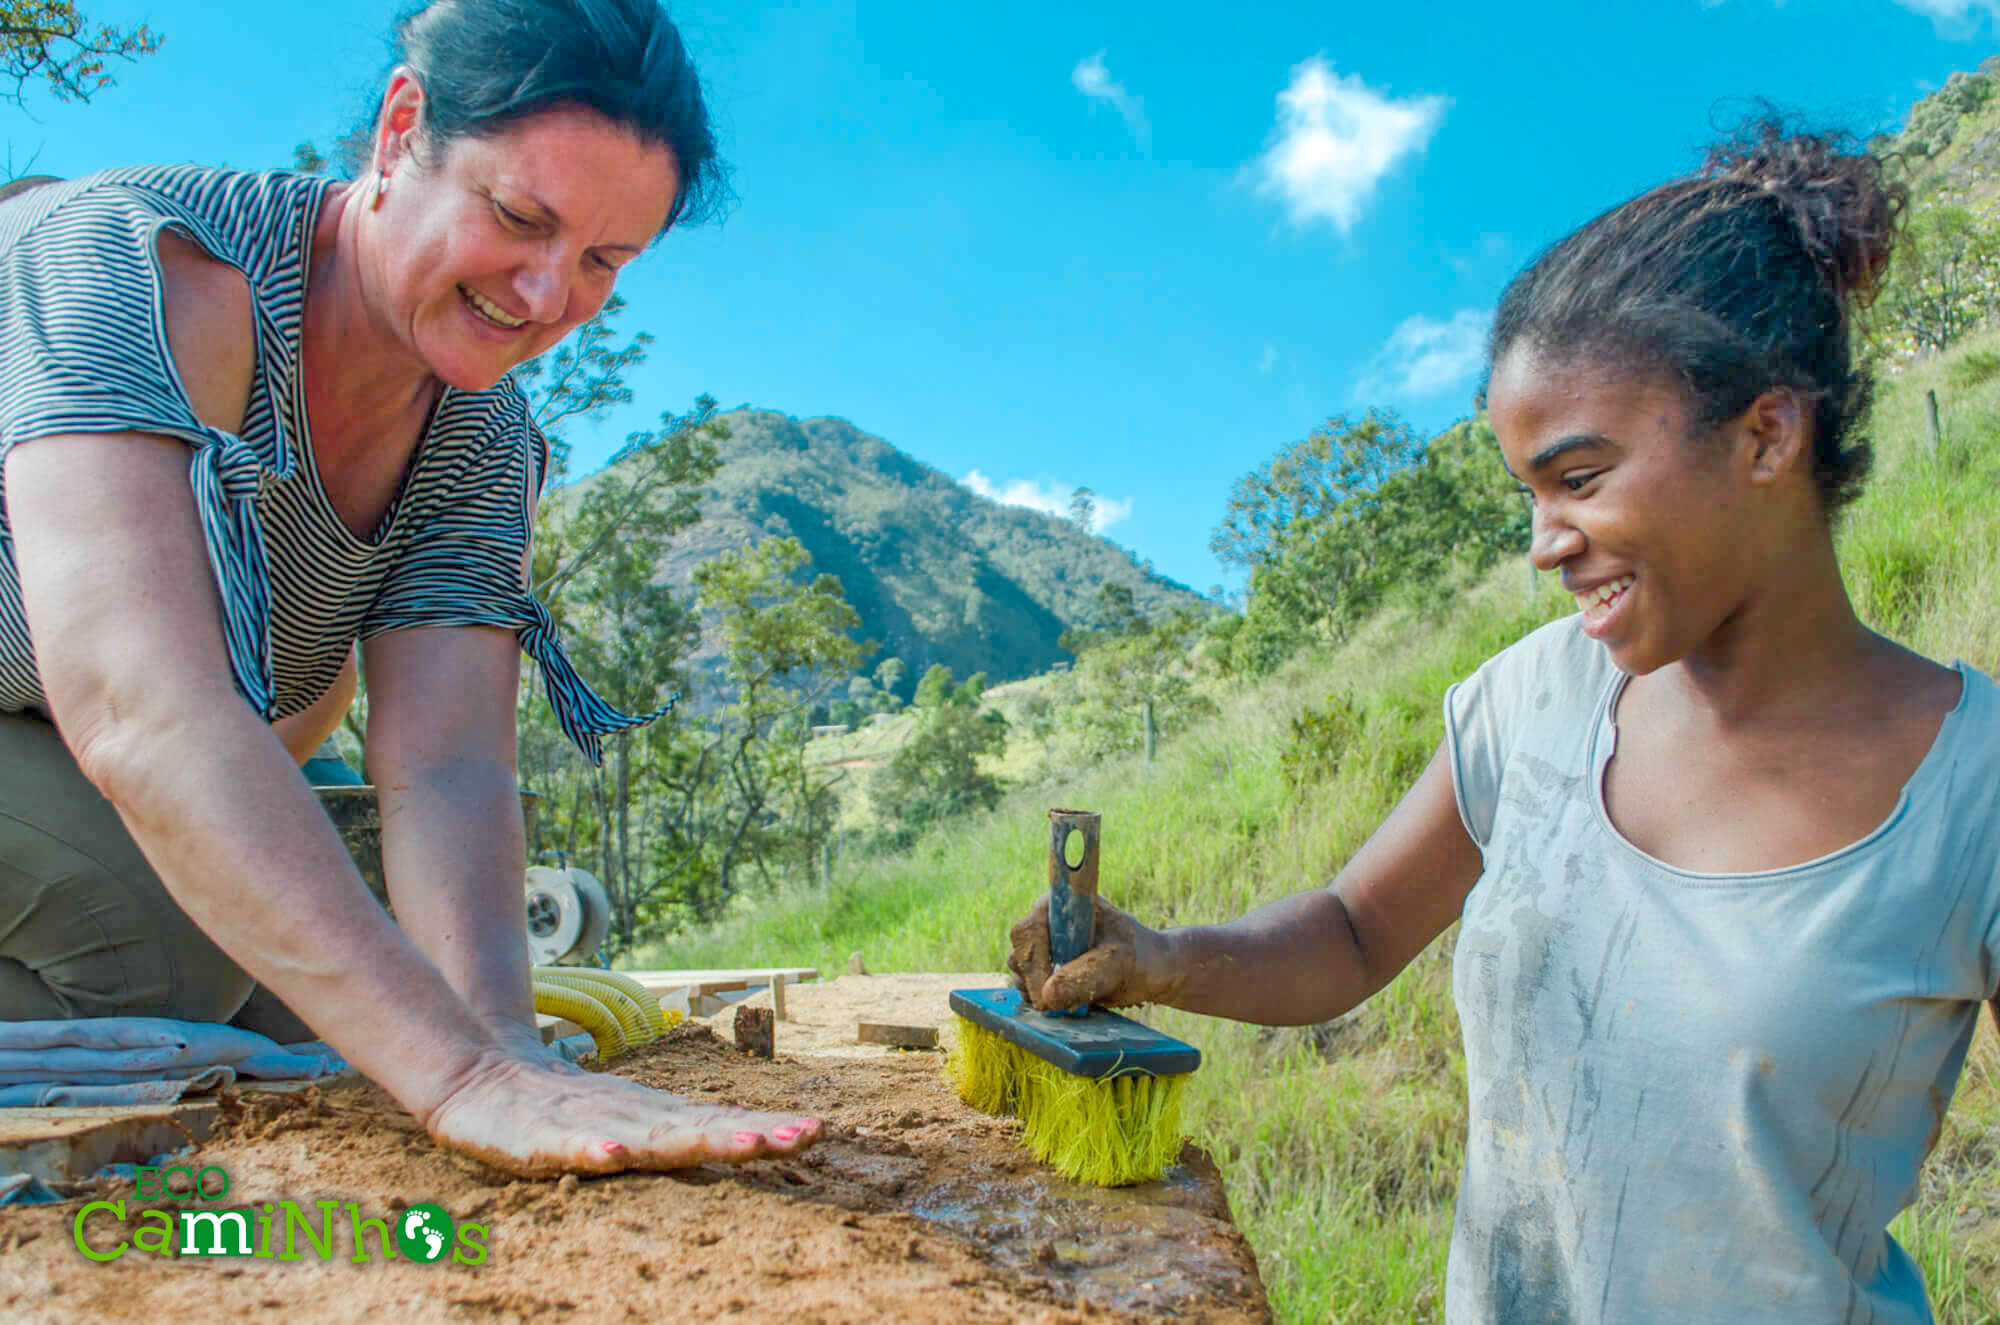
    With the base of the wall complete, we can begin “raising the cob.” We lift a handful of cob over the walls and shape it. One hand can be the shape while the other compresses the cob and incorporates it into the bottom layer. It is important to make a large monolith with the cob, avoiding weak connections between the layers. These connections can be made with the thumbs or with the help of a stick.

    The top of the wall must be moist so that the next layer can adhere, and the bottom dry enough to support the weight of more cob. Drilling holes in the top of the walls – when you plan to finish the same wall the next day – helps in fitting the new cob. We also use a mixture of sieved clay and water to moisten the walls when they are dry and to help the new layer stick.

    It is also important to take care of both sides of the wall, internal and external, so that it grows steadily. Remember: it is always better to make the walls too thick than too thin. The walls can be checked with a leveler and, at the end, trimmed to be more accurate. A machete, a cleaver, a saw, or a shovel can make good tools for this.

    After the foundation is made and the walls are erected, trimmed, and dried , it will be practically ready. Building cob walls is as simple and fun as that!

    [vc_btn title=”Learn More About Volunteering With Us!” style=”outline-custom” outline_custom_color=”#666666″ outline_custom_hover_background=”#33b208″ outline_custom_hover_text=”#ffffff” shape=”round” size=”lg” align=”center” button_block=”true” link=”url:https%3A%2F%2Fzieplay.com%2Fvolunteer-opportunities%2F|title:%5B%3Aen%5DVOLUNTEER%20APPLICATION%20FORM%5B%3Abr%5DFormul%C3%A1rio%20de%20aplica%C3%A7%C3%A3o%5B%3Asp%5DFormulario%20de%20aplicaci%C3%B3n%5B%3Aes%5DFormulario%20de%20aplicaci%C3%B3n%5B%3Apb%5DFormul%C3%A1rio%20de%20aplica%C3%A7%C3%A3o%5B%3A%5D|target:%20_blank|”]

  • How to Make Cob

    How to Make Cob

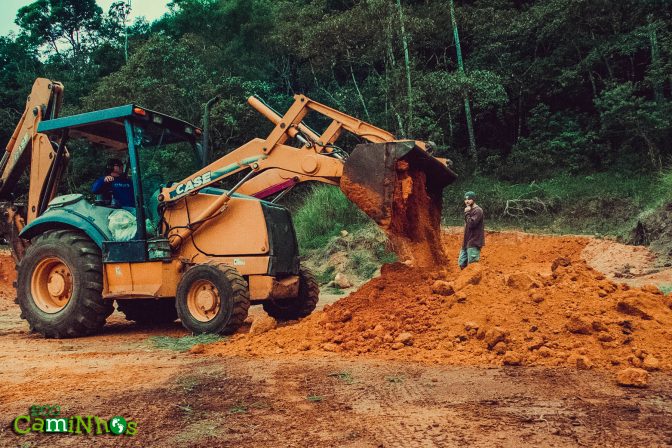
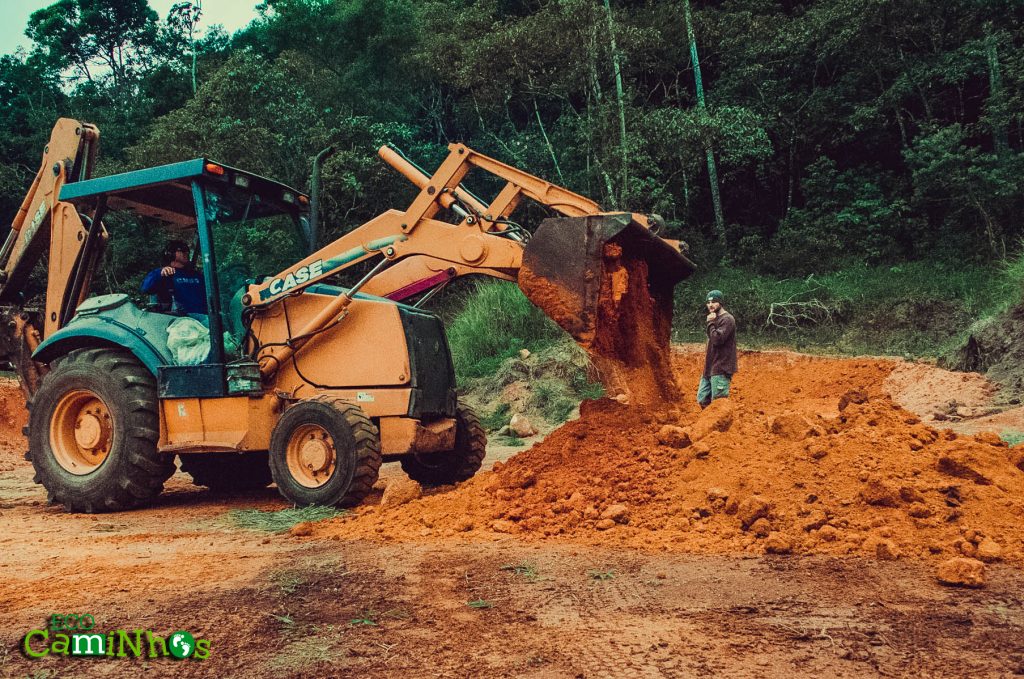
    A significant advantage of cob is that it can be made using materials from the construction site itself, taking care to obtain them in a way that minimizes environmental impact and requires less use of resources. Having the source close, such as the land resulting from excavations on the site or in the vicinity, reduces costs and the energy lost – mainly for transportation.

    Clay, sand, and straw will be needed to mix the cob. Depending on your soil, the content of 50% clay and 50% sand or 15% clay and 85% sand may work. The proportion of the materials is flexible and also makes it possible to make corrections with the addition of the missing component. Most of the sandy-clay soils are appropriate, requiring only the addition of straw.

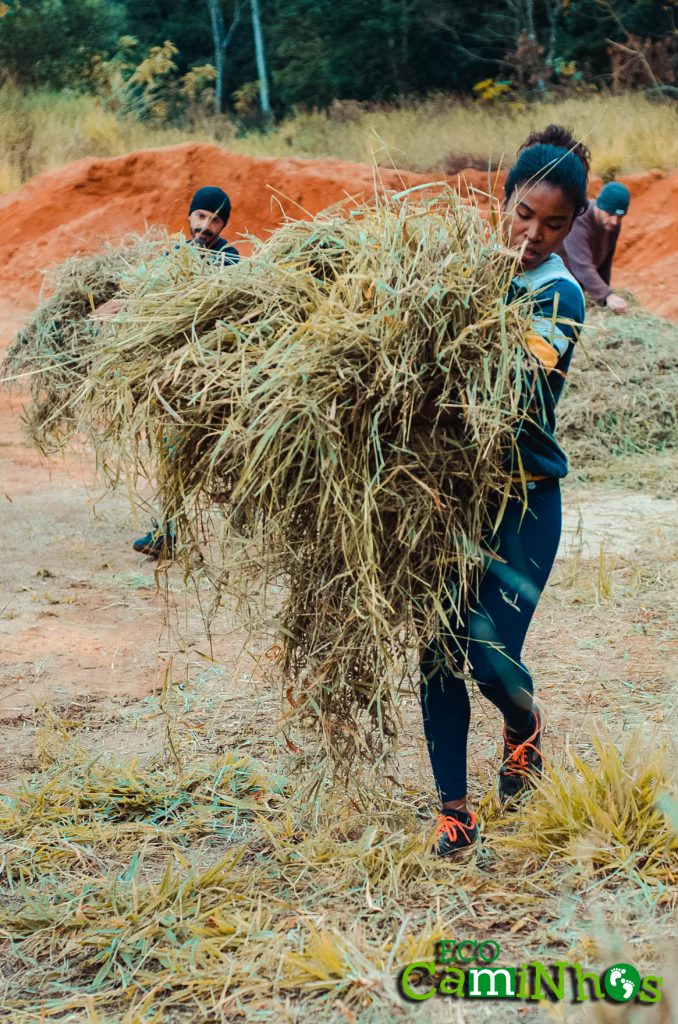
    The straw serves to increase the resistance and also to prevent cracks after drying. Its incorporation makes the mixture drier, requiring the addition of water to achieve the ideal consistency. Here at Eco Caminhos, we get straw brushing the grass and letting it dry in the sun for a few days. 

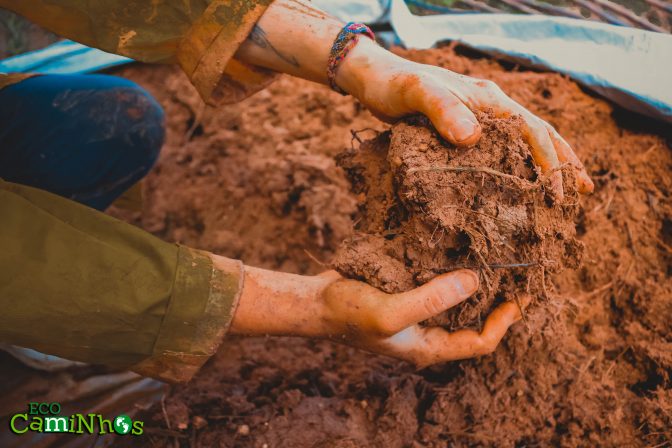
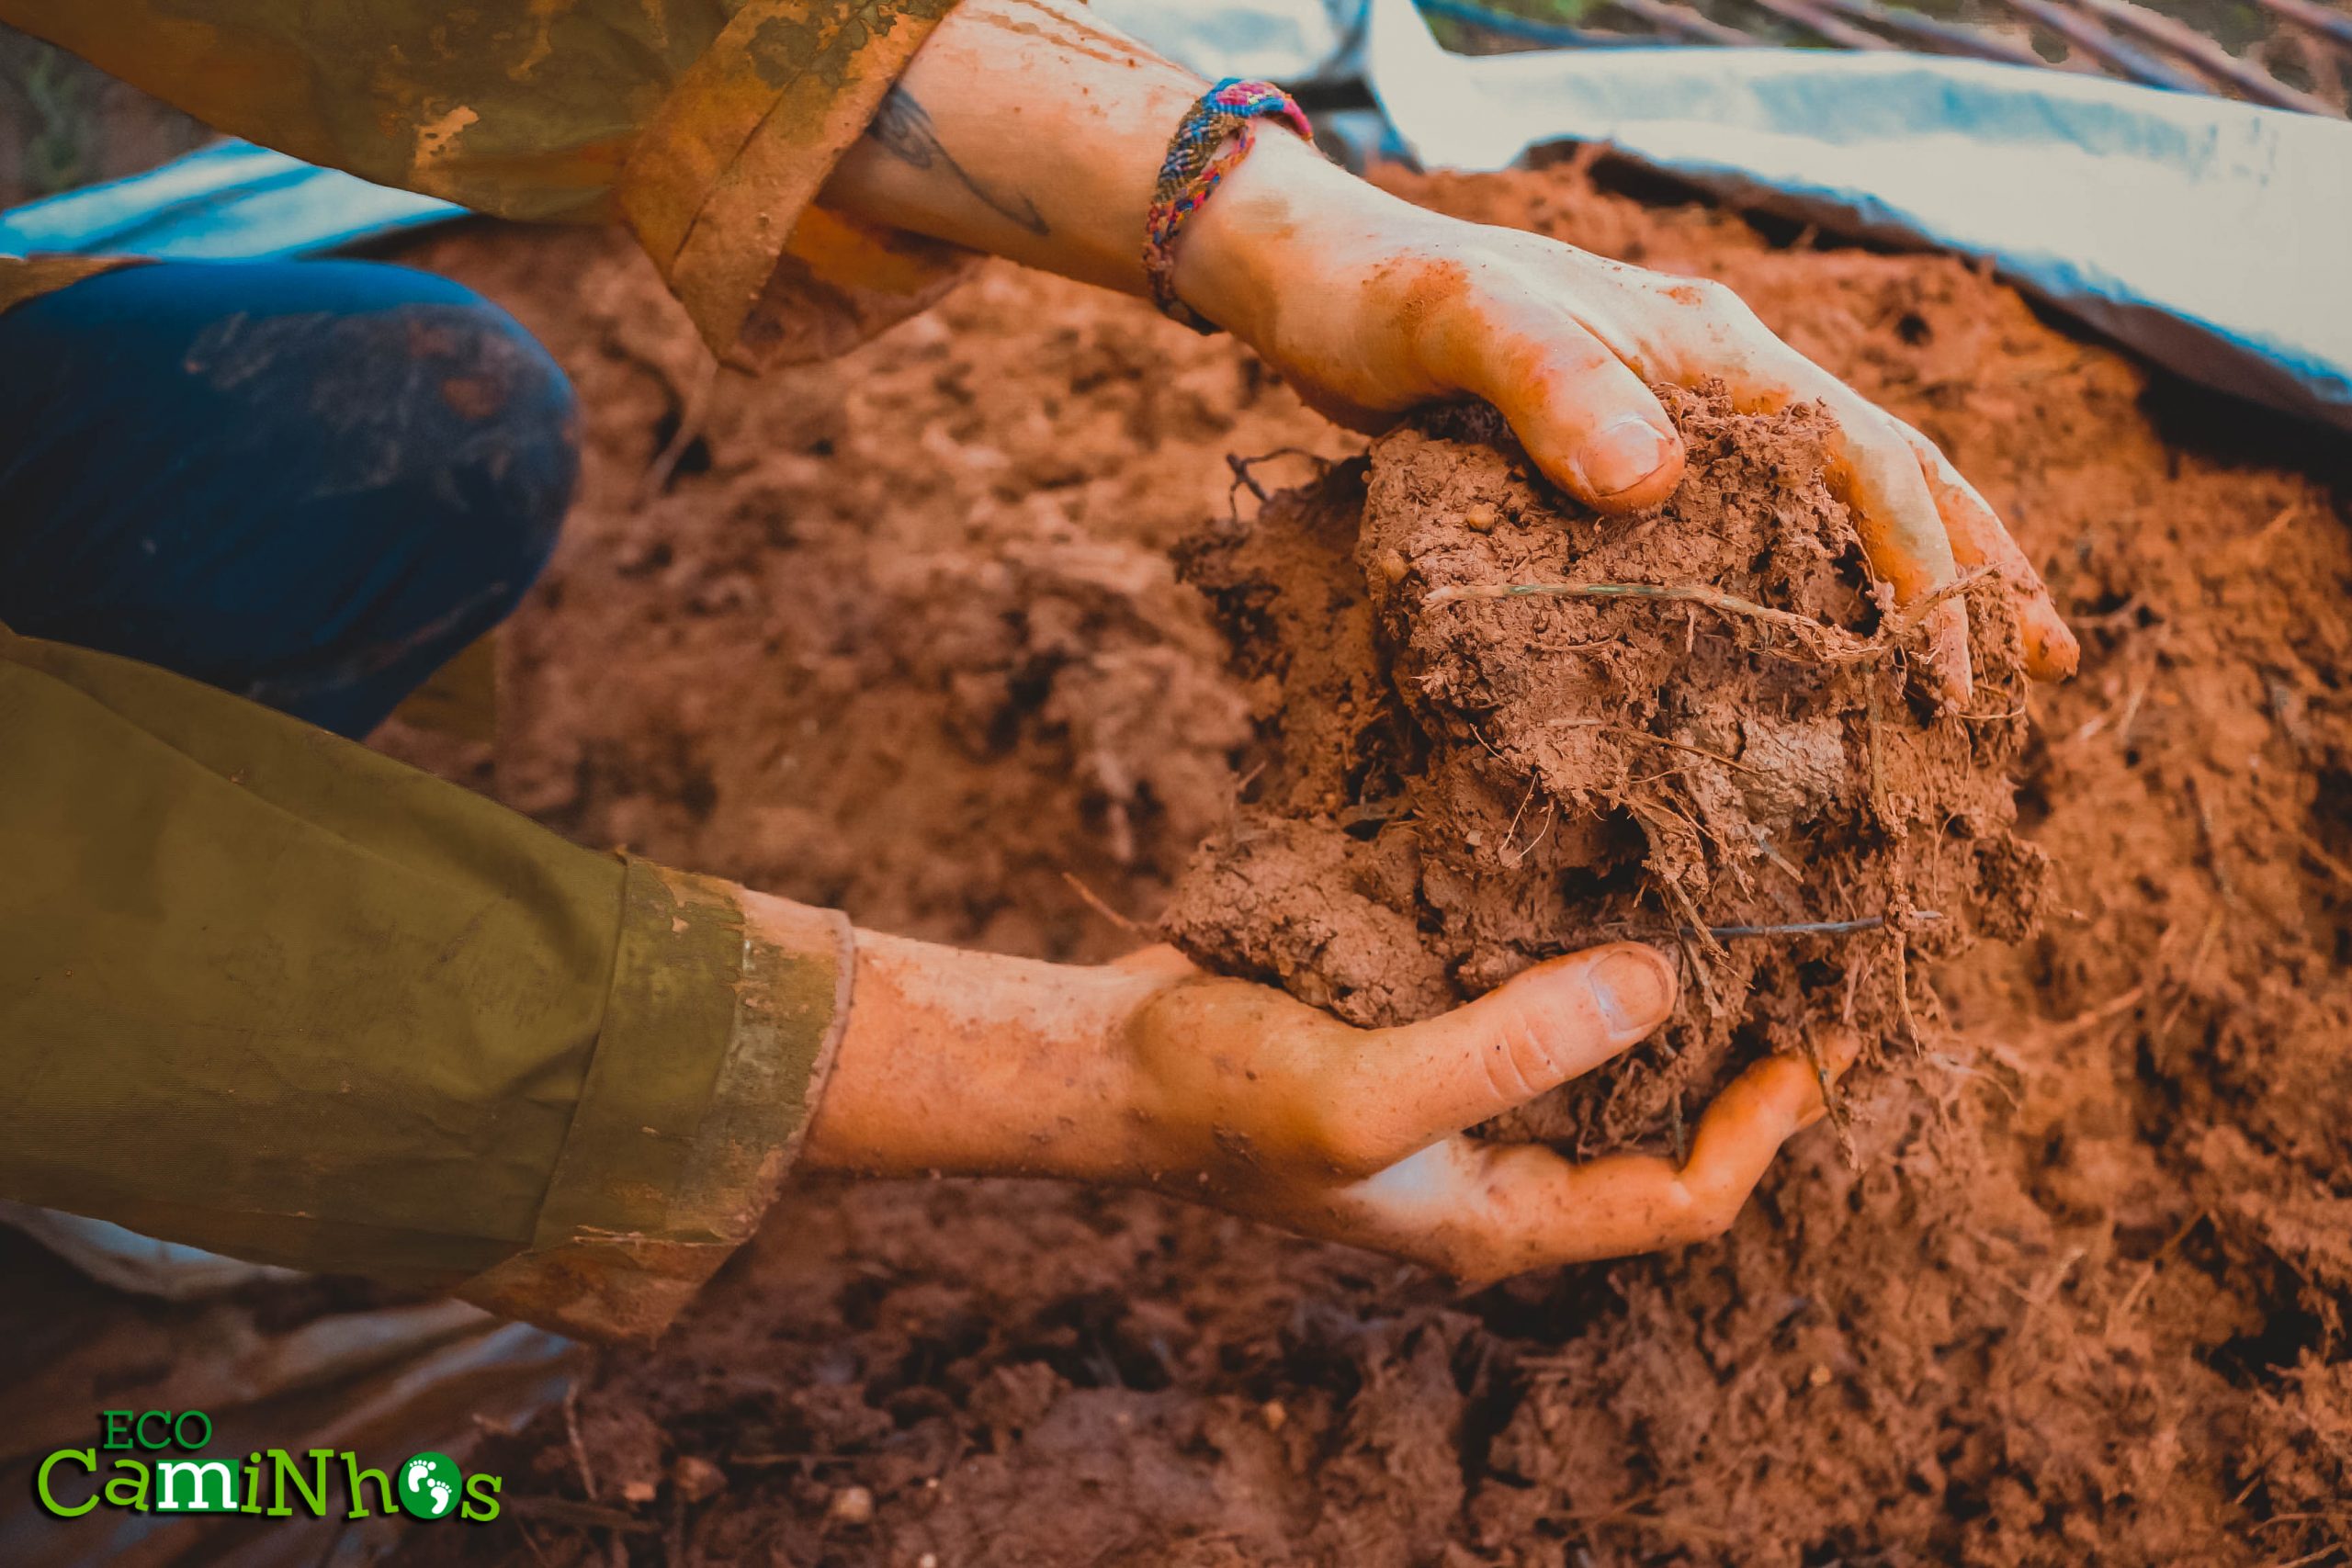
    For the preparation of the mixture, you will need a free, flat place and a tarp to throw the soil. You will mix and knead the clay, with the addition of straw and water until you get a firm, yet plastic consistency. This mixture can be made manually in groups (using shovels and kneading the clay with your feet) or with the help of machinery to speed up the process.

    Testing is important to find a good mix for your soil. You can make test bricks by trying various recipes and combinations and figuring out which ones work best and are easiest to make. Excess sand makes the brick crumble when dry, and excess clay causes the brick to break. The amount of straw is difficult to quantify, but it is important that each straw is surrounded by the soil mixture.

    A good combination of mixing and compression is a big part of the magic that transforms the ingredients of cob. In a short time of familiarization, you will start to have the tact to do so. Trust in yourself. Try it!

  • What is cob?

    What is cob?

    Here at Eco Caminhos, we use a lot of cob. But what exactly is cob?

    Cob is a natural building (bioconstruction) technique consisting of clay, sand, and straw which is all mixed together with some water. As an earthen construction, it has a very low environmental impact, can be made with locally sourced – even onsite – materials, and results in BEAUTIFUL builds!

    Colmeia: our first natural building (bioconstruction) house right here on the Eco Caminhos farm.

    The term cob comes from medieval England. As a building technique, however, cob has been developed independently by various cultures from all around the world since ancient times. Some of the world’s oldest structures were made with cob and many have survived to this day because of how durable the structures are! Because of this long and multicultural history, it is important to note that cob also goes by many other names (like adobe). More recently, cob construction enjoyed a revival in Europe and the US during the 1970s because of its superior durability and sustainability in comparison to modern building techniques. 

    Making cob is pretty simple, too. You mix clay, sand, and straw with water to form a homogeneous and plastic mass. Taking chunks of this mass and stacking them on top of one another allows us to lift walls for homes and buildings. You could also build a variety of other structures like furniture and ovens! Cob, once dry, resembles concrete and is very hard and sturdy. 

    Cob is a mixture of clay, sand, and straw with water that forms a homogeneous and plastic mass.

    Cob’s moldability allows us to build almost any form in a variety of styles, so it should be no surprise why it has become so popular in natural building (bioconstruction). From traditional homes with straight walls, to unconventional and alternative styles with curves and domes, cob can do it all!

    It can also be used in conjunction with other materials and building techniques. One example is wattle and daub, where walls are made by filling and covering a bamboo framework with cob. Some other examples include cob walls made with reused glass or plastic bottles fitted into them, and frame and furniture inlays made of the same mixture. 

    Despite its simplicity, cob as a construction technique is extremely safe, durable, sustainable, and capable of creating comfortable living environments for us. Due to its earthen properties, thick cob walls offer great thermal insulation and reduce indoor humidity which, in turn, reduces energy consumption for heating and cooling. 

    Naturally built cob homes are wonderful, for they give us the freedom to build whatever we like, can be integrated into the surrounding landscape, are sustainable and environmentally friendly, and even surpass conventional construction techniques on several fronts. Check out some of our cob-based projects here and see for yourself!